Testing the new board

As the board survived the power-up test I was able to start testing more tricky parts – those that require software to run in the processor. As I never dealt with TI DaVinci (or any other ARM processors) before it is going slowly. Production cameras will probably run some flavor of the OpenEmbedded, but for hardware testing I decided to take a shortcut and use whatever is recommended and is available for download on the processor manufacturer’s site – Texas Instruments. And that is based on Monta Vista distribution. I had to agree with their EULA that I took time to read carefully. It seems that license prohibits me to even describe my experience with it. So I will not do that – anyway it is a temporary solution that will never go beyond a single prototype board.
Next thing to do was to try to boot something to the processor and here again – I used the recommended bootloader software that (host part of it that communicates with the program running on the target – the processor being booted) turned out to be written in C# – the language that I thought I’ll never have to use. But – that thought turned out false, especially as there was nice documentation how to use mono, and explained that I need to upgrade the version that comes with Ubuntu otherwise the bootloader will get stuck. And it did really, so that recommendation is still current – at least for the 9.04.
With the patch it worked (at least did something), but only until I decided to recompile the software – I wanted to add some debug code to get some proof that it loads anything. The software is provided as an archive that includes both source and built code and initially I tested just the compiled version. Compilation failed. First I found that I can disable the non-GNU/Linux branch in the top Makefile as I did not needed it. But still it complained about the problem in the C# code itself – the problem was fixed by adding “(Byte)” before “0xFF” in one file – that was my first experience with this language.
With that solved I tried to modify configuration, compile and run u-boot (actually there is a version u-boot-ti that at least knows about the dm6467 – main branch does not have it). Spent a whole day but no success so far, and I could not be sure – is it the software/configuration bug or the system memory (2 of the DDR2 chips) do not work properly – that was what I was really afraid of.
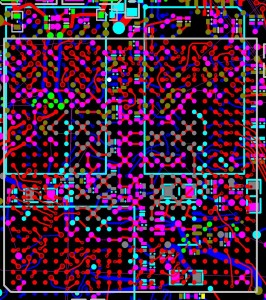
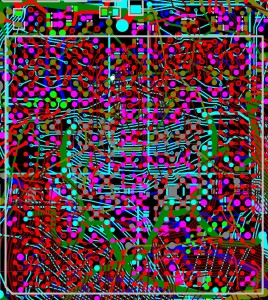
That memory consists of the two fine-pitch BGA chips (two large cyan colored rectangles on the images above) , mounted directly opposite to (on the other side of the PCB) the DaVinci chip (large white square). All the signal traces (red on the images) go to the nearest blind microvia (most – only a fraction of a millimeter), then dive to the inner layer, go there (brown traces) until a buried via that brings them one layer from the other side (cyan) , finish their travel and resurface through a microvia near the destination (blue traces). Both microvias are in most cases under the chip bodies – CPU and memory. So no chance to reach them with a oscilloscope – I had only to hope that the design, PCB manufacturing and BGA assembly did not have a single error. So I put aside u-boot troubleshooting and made a dirty trick – modified the bootloader software (that I already was able to compile) so after loading u-boot code to the DDR2 memory it sent all of it back to the host in the same format as “hexdump” utility does. And all 90KB or so matched perfectly, so one of the critical milestones is over – there is working TMS320DM6467 processor that interfaces with the host over USB and has 256MB of the working DDR2 memory. Now I’m sure that there is some my misunderstanding with u-boot that holds me from running it.
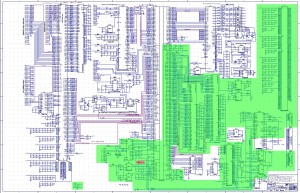
The image above the posting shows the 10373 circuit diagram with the green over the parts that are tested and seem to be working as designed. There is a small red rectangle there – the problem caused by my laziness to play with cp2103 evaluation board – I missed that GPIO pins can only operate as open drain outputs, can not be configured as push-pull ones (at least I could not figure out how to do that).So I’ll have to put a small transistor there (as an inverter) on the prototype and add that to the list (so far only one entry) of the changes to the PCB in the next revision.


Leave a Reply